
While adding a tarmac driveway to your home is a cost-effective and durable solution, over time it can become worn and things like cracks and potholes can appear. If your current tarmac drive is showing any signs of wear and tear, you will want to repair it sooner rather than later.
Tarmac drive repair jobs can be a do-it-yourself project or you may prefer to get a professional team in to do it for you, to make sure the project is done to the highest standard. At iDream Solutions, we have an expert surfacing team available to help maintain or replace your Cornwall driveway or Devon driveway , so be sure to contact us if you would like a free quote for your tarmac driveway repair project.
However, if you would like to repair your tarmac drive yourself, read on to find out more.

What Can Cause A Tarmac Driveway To Become Worn?
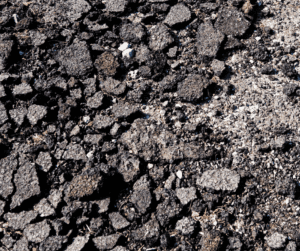
While tarmac driveways are a low-maintenance driveway solution for your home, over time, oils such as petrol, diesel and brake fluid can soak into the tarmac and dissolve the aggregate and materials within. Paired with constant use and temperature fluctuations, your tarmac binders can become unstuck, creating small cracks and holes.
Once small cracks appear in the tarmac’s interior, oil can seep into the tarmac and spread. Degrading the materials it comes into contact with, eating its way through your perfect driveway surface and causing further holes and cracks to appear.
Find out more about how to keep your Devon tarmac driveway clean & clear of moss and algae and tarmac driveway pros & cons – what you need to know in our recent blog posts.

DIY Tarmac Driveway Repair – Step By Step Process
If you have a hole in your driveway, it can be easy to ignore it at first, but constant driving, cycling or even walking on or around the hole can encourage the area to grow. Then, before you know it, your beautiful tarmac driveway is covered in crumbling tarmac and potholes!
1) Cut Out The Affected Area:
If you’re patching a hole for your tarmac driveway repair tasks, begin by cutting out the affected tarmacked area, with at least a 100mm border around it. Cut your hole out in a neat, rectangular octagon shape using:
- A power saw
- Floor saw
- Angle grinder
- Hammer and bolster
2) Remove The Contaminated Tarmac
Once you have cut out your rectangular or octagon-shaped hole around the contaminated area, you must then begin to remove any of the crumbling tarmacs. Remove all material and surface up to the cut line. Any tarmac spoil must be disposed of properly, either in a skip or a bin.
3) Measure The Replacement Area
For smaller tarmac drive repair jobs, such as fixing holes, you may want to purchase a bag of premixed tarmac, cold lay or cold pour, an effective DIY solution. These can be bought from most builders’ merchants in 25kg bags.
To ensure you purchase the correct amount of tarmac, measure your hole width by height and then multiply the length and width together to get your square meterage. Typically most residential tarmac driveways will be 75mm thick, so each 25kg bag of premixed tarmac will cover approximately 0.15m2 of driveway surfacing.
4)Prepare The Area
Once you have purchased the correct amount of tarmac, thoroughly clean out the area by removing any leftover material and making sure it is dry.
Before you pour any of your new tarmacs into the cleared area, you must first prepare the vertical edges of your hole. We recommend priming it with some cold pour, simply apply some of the solutions to the edges with a paintbrush.
5) Patch Up The Hole
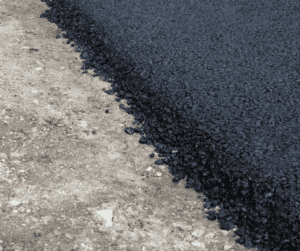
Pour your tarmac mixture into the prepared hole, filling up approximately ¾ of its depth. Using a small roller or a lump hammer, compact the tarmac down firmly.
Then pour the remaining tarmac into the hole, until it is flush with the original surface. Compress the tarmac and level off.
Top Tip: Follow the instructions on your tarmac – most premixed tarmac is blended with additional substances such as a retardant that prevents the tarmac from setting in the bag, however, when exposed to air the setting process becomes active. For best results, we recommend allowing the tarmac to warm up naturally before use.
6) Seal The Join
Once you have successfully filled in your hole and the new tarmac is level with the existing driveway surfacing. Apply further cold pour or tarmac mixture on the edges of the patch, to seal the connecting area, capping the join and ensuring it is water-tight.

Larger Tarmac Drive Repair Jobs
Sometimes a small tarmac drive repair, as detailed above, isn’t the best option, especially if your driveway has several small and large holes. This is because, although the repaired driveway will last for many years to come, the repaired area may never be as hard-wearing as the original tarmac.
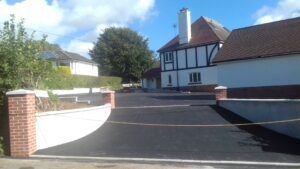
Tarmac drive repair from iDream Solutions, is a long-lasting and effective repair as we will use hot macadam and will be compacted using our professional equipment. This means it is more likely to be a high-quality and lasting repair. Alternatively, if you wish to replace your tarmac driveway with something long-lasting, low-maintenance and attractive, our range of block paving Devon or resin driveways could help transform your driveway.
Our iDream Solutions team will be happy to assist you, we will be able to provide you with a no-obligation quote and either resurface your driveway or professionally and carefully patch up the damaged areas.
Replace Your Tarmac Driveway With iDream Solutions
If you don’t think undergoing tarmac drive repair projects will benefit your driveway in any way and you want to transform the appearance of the entrance to your property with the help of a domestic driveway company, at iDreams Solutions, we offer a wide range of surfacing in and around Devon and Cornwall including:
- Tarmac driveways Exeter
- Tarmac driveways Sidmouth
- Tarmac driveways Okehampton
- Tarmac driveways Newton Abbot
- And many more areas.
Contact us today on 01626 680194 or email us at contact@idreamsolutions.co.uk for a free quote or site visit. See how we could help transform or repair your tarmac driveway by viewing past projects in our gallery or by reading our latest case studies. All iDream Solutions driveway surfacing projects come with a 10-year insurance guarantee.